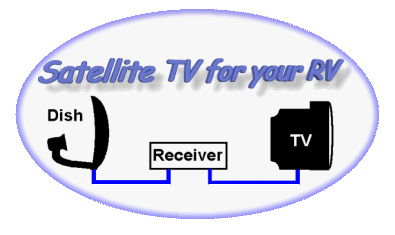
First off, most of the available satellite systems are pretty similar from a hardware standpoint. All pretty much have a small 18" or 20" dish, a receiver, a remote control and a pile of installation goodies. These systems were designed to be installed on your house and for the most part, can easily be installed in your mobile house as well. Lets take a look at a simple block diagram of a basic satellite system and it's interconnections:
Most folks will purchase a simple, relatively inexpensive satellite system to start out. This makes sense for a lot of reasons:
Since the satellite antenna or dish is the place where your system starts
to receive your programming, that's where we'll start too. There are about
as many different satellite dishes available as there are channels! Dishes
range from that simple single LNB dish that came with your basic system
all the way up to mobile dish units that can locate and track the satellite
automatically, even when you are driving down the road! All these dishes
work on the same basic principle and do approximately the same job: they
collect the weak signals from the satellite orbiting overhead and amplify
them before sending them along to the receiver. Since the signal is so
weak, the parabolic dish antenna must be pointed directly at the satellite
with a fair degree of accuracy and must be tightly controlled to keep it
pointed there. For most of us on a typical limited budget, a manual dish
antenna of some sort is probably what we'll have. That means we'll be responsible
for getting that antenna pointed in the right direction and keeping it
there. For those of you with the money to afford an automatic antenna,
this section really doesn't apply to you unless you have a backup manual
antenna. Many folks with automatic systems still carry a simple manual
antenna. You may wind up in a parking situation where your automated wonder
won't be able to lock on and your only hope for TV is to set up that old
manual antenna.
 |
|
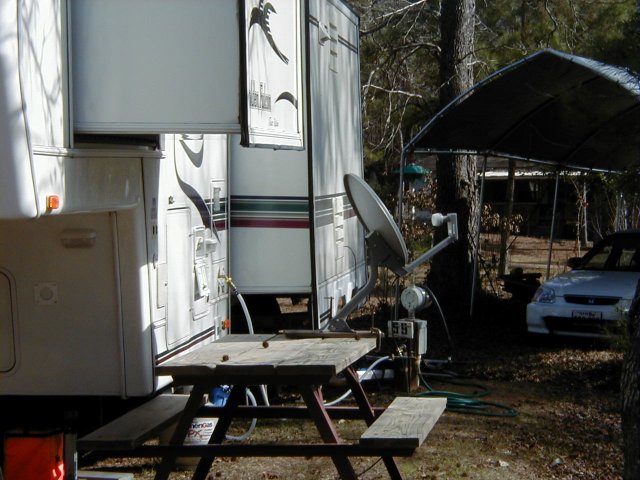
In order to receive satellite signals, the dish must be firmly anchored
and pointed in the correct direction. There are about as many ways to mount
a dish as there are RVers.
|
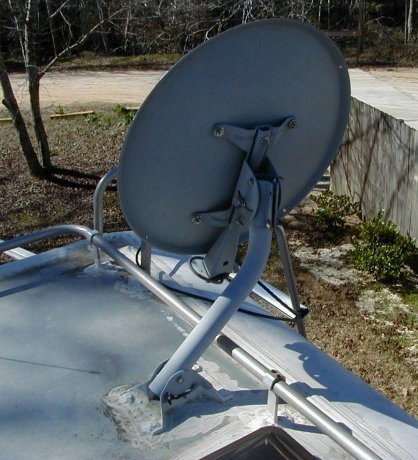
Personally, I installed the standard roof mount that came with my satellite
system on the roof of my rig. This allows me to use this mount when I'm
going to be staying put for a while. With the dish on the roof, it's much
more stable and wind resistant. Also, it's less accessible, in case someone
might be tempted to tamper with it.
Occasionally, dishes set out on tripods will get stolen.. it's rare, but it does happen. Also, you may encounter a neighbor with a low sense of humor (you guys know who you are!) who delights in standing in front of your dish and blocking your signal right in the middle of your favorite program. Roof mounting prevents all this, but can be a bit more strenuous, as you must crawl up the ladder and attach the dish. |

|
When I break camp, I remove the dish from the roof mount and then the mount folds down out of the way. I stow the dish and the connection cable in a compartment during travel. |
| Alternately, you can purchase a RV style, crank-up dish antenna that folds down flat for travel. These antennas install through your RV roof similar to a standard batwing TV antenna. With this roof mount antenna, you crank it up into position and then adjust elevation and azimuth to find your satellite. | 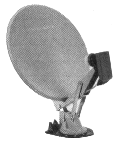 |
A variation on this theme is the automatic rooftop antenna. These units automatically extend and seek the satellite, providing hands-off ease of use. There are drawbacks, though.. not the least of which is the rather steep price! Still, they are great gadgets and make setting up the satellite dish a push button affair | 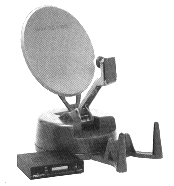 |
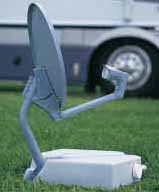
Roof mounted antennas are great, but can't be used in all situations.... sooner or later, you are going to run up against Satellite TV's arch enemy: Trees! Unless you like to park in the center of huge parking lots or football fields, you are going to find yourself in a spot where your roof mounted dish is staring directly at a tree. Satellite signals are weak, and it doesn't take much to block them! A branch with a few leaves on it is often enough to keep you from getting a signal! In these cases, it's necessary to have some kind of alternate way to set up your dish.
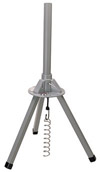
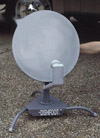
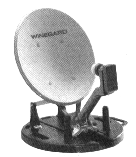
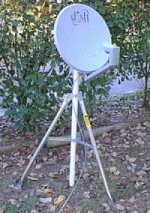
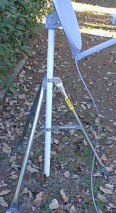
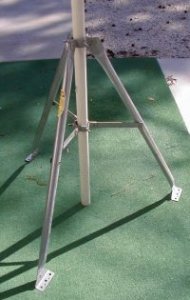
That's where tripods and ground mounts come in. There are a lot of different styles available.... if you stroll around any RV park, you'll see a wide variety of homemade and store-bought dish mounts. Some people even attach the dish to their ladder or picnic table. Here are some examples of different ways to mount a dish:
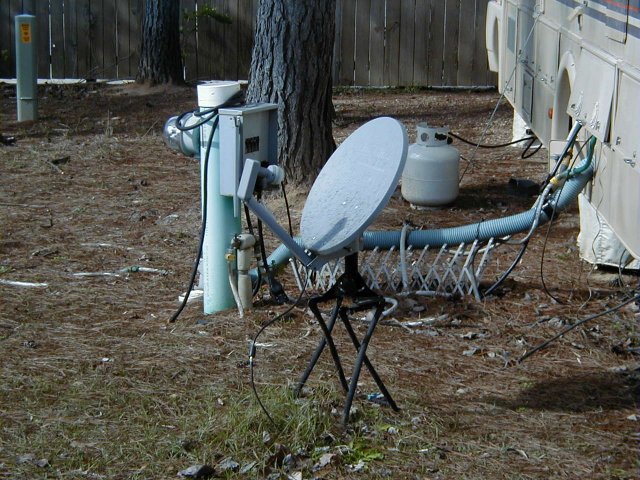

Here are some typical store-bought satellite tripods and stands.
 |
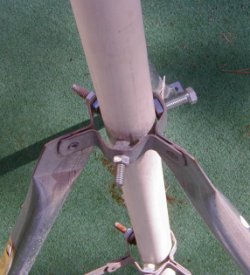
I think that the best "bang for your buck" tripod is the one that you make yourself. Run down to your local Radio Shack or Appliance store and purchase a rooftop antenna tripod. These are used to mount old style TV antennas on the roofs of houses and will usually set you back less than $20. On your way home, stop off at the home center and pick up a piece of 1 1/4" thinwall PVC pipe... 4 feet ought to do it, more is OK too. Often, you can pick one up from the remnant pile for under a dollar. You can also use a piece of chain link fence post or a piece of muffler tailpipe... all you need is a piece of pipe that is the correct diameter to fit your satellite antenna's mounting hole. Put the pipe and tripod together and you have a handy-dandy folding satellite dish tripod mount! |
 |
 |
Here are some close ups of my home-made tripod. Using the hardware and
goodies that came with the antenna mount, I was able to devise a simple
clamp to keep the pipe in place. It folds up nicely for storage when not
in use.
|
 |
The tripod is great for finding an opening in the trees.... make sure that you have some extra cable along so that you can reach over to that clearing that you've found. I keep a 75 foot piece of RG6 cable for those times when the dish needs to be "way over there".
If you are camped in a windy area, it's a good idea to anchor the tripod
to the ground somehow so it won't be blown over. Some favorite ways to
do this are: hang a couple of gallon plastic milk jugs filled with water
or sand from the tripod, drive a stake into the ground and attach the tripod
with a bungie, or use one of those corkscrew anchor thingies and a bungie.
Any of these methods will provide a pretty good anchor. 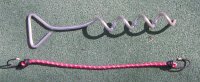
When I arrive at my destination, I make a decision to either put the dish up on the roof mount or break out the tripod and set it up that way. Flexibility is the key here... I have only rarely been camped somewhere that I couldn't get the dish set up and working... Occasionally, I have had to place the dish on it's tripod a long ways from the rig... that's when a satellite meter comes in mighty handy and we'll discuss it's use in the Finding the Satellite sections.
Many of the smaller receivers will fit in an existing cabinet or in your entertainment center, if you have one. Remember to follow any special recommendations that the manufacturer makes and also avoid blocking the cooling vents on the receiver. These vents need to be open to keep the receiver from overheating. It is usually not necessary to use the receiver's front panel controls (if any) as all the functions are accessible from the remote. Use common sense: don't mount the receiver where it can get wet or directly over a heating vent, etc., etc. Make sure that there is an AC outlet somewhere nearby... we don't want to have to run an extension cord to power the receiver. Think about how you will route cables from the receiver.... at a minimum, we will need to run one coax to the TV and one to the satellite dish. There's bound to be a good place somewhere... Keep looking!
My receiver was simply too deep to fit into any of my existing cabinets. After much deliberation, I decided to mount it on my wall. This has actually worked very well! The receiver is in a good position to sense the IR beam from the remote and with some cable clamps and ties, the wiring looks fairly neat, even though it is exposed. Take a look:
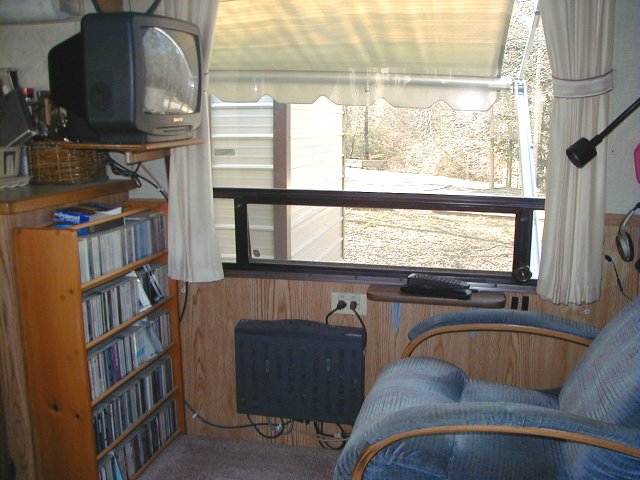
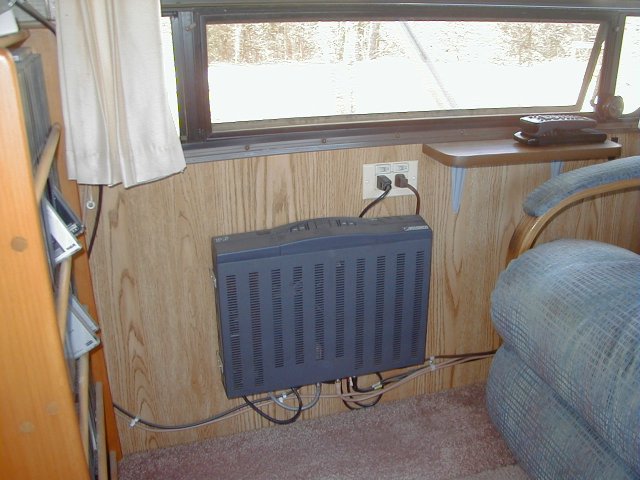
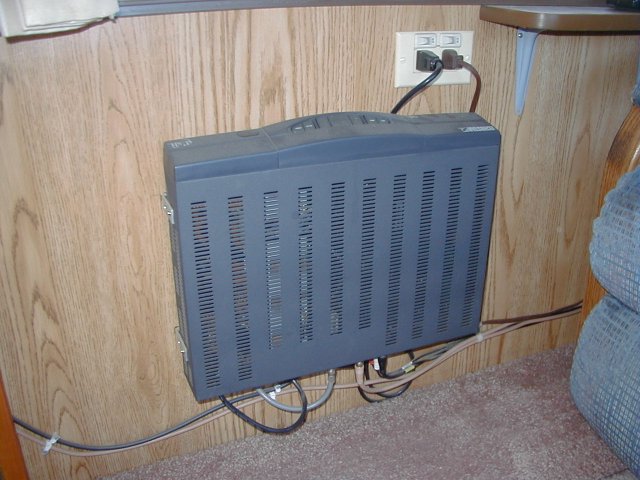
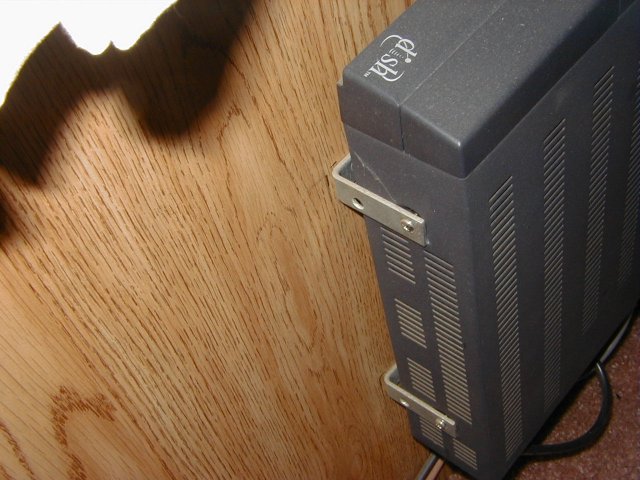
The wires that you see running along the wall behind the chair are going to my VCR, which is also wall mounted. It's back behind the chair where it's out of sight, but can be easily reached to insert tapes. I mounted the receiver using small "L" brackets as shown in the last photo. I didn't want to drill holes in my nice new unit so I attached the brackets using the existing screws on the side of the receiver. If you just can't find a place for your receiver, consider mounting it on a wall or on the side of a cabinet. Use your imagination!
OK, we've found a place for our receiver, now lets concentrate on getting the Satellite signal to it. First thing we will need is some cable. Most satellite systems come with a self installation kit that will include a length of RG-6 coax cable, usually 100 feet. This is probably all the cable you will need. If you don't have an installation kit, that's OK. Cable and connectors are available at many home centers, Radio Shack stores and appliance stores. Although you can use RG-59 coax cable, the RG-6 is better. Here's why:
These are basic specs for the two common types of cable used with TV systems. Both are 75 ohm impedance.
RG-59BU, ~ 6.15 mm Ø, ~ 3.5 dB attenuation/100m @ 10 MHz.
RG-6/U, ~ 7 mm Ø, ~ 2.3 dB attenuation/100m @ 10 MHz.
RG-6 is slightly larger in diameter and offers a much lower attenuation over distance than RG-59. If you are going only a short distance to your dish, then RG-59 is acceptable, but once you start passing the 25 foot mark, it really starts to affect your signal strength.
If you are planning to run across the stream and over the hill to your dish, you should probably use RG-11 Coax Cable. It's huge! RG-11 is much larger in diameter and is designed for CATV, UHF, and DSS runs of 400+ ft. Not something a typical RVer would need, but I thought I'd throw it in here just to confuse you! ;-)
Well, if we've got the cable figured out, then we need to pick up some
connectors for it. We want to be able to cut the cable to the length we
want and then re-terminate it with the proper connectors. There are a wide
range of connectors available, including many that need a special crimp
tool to attach. Probably the easiest to use are the line of "twist-on"
connectors sold at most Radio Shacks and home centers. 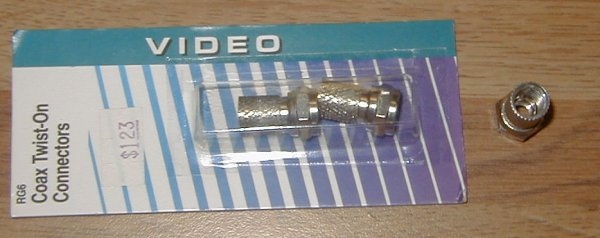
Simple to use and relatively trouble free, these connections can be installed on a cable using only a pocket knife and your fingers. Instructions are included on the package.. just be sure to pick out the correct connector for the cable that you are using.
Now lets find a way to get that cable inside the rig. The easiest way
is probably to run the cable in through a window. This certainly isn't
elegant, but it does work! You can even buy a special length of flat cable
designed to fit through an existing window and allow you to almost close
it. 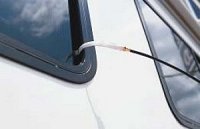
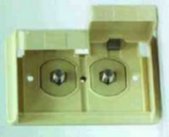
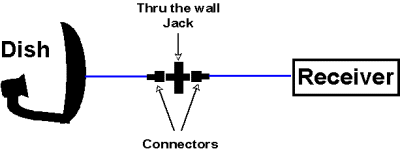
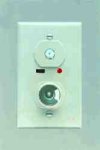
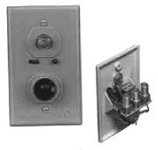
A neater way to do it is to install a cable connector permanently in the side of your rig, or in a compartment. There are many easy to install, weather proof connector jacks available... here are a few common ones.
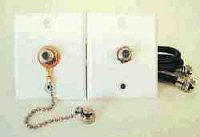
Using the jack will give you an easy, weather proof method of connecting your dish to your receiver. Install the jack wherever it will be convenient for you and run a length of RG-6 cable from the jack to the receiver's satellite antenna input.
Some newer RVs come equipped with such wiring already installed. Check your owners manual or ask your dealer if your rig was pre-wired for satellite.
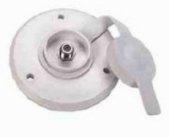
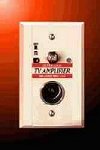
One common misconception is that you can use the existing cable TV inlet on the side of your rig to wire your satellite antenna. In many rigs, this won't work and here's why: Many RVs have an amplified "bat-wing" antenna installed. The amplifier looks something like this.
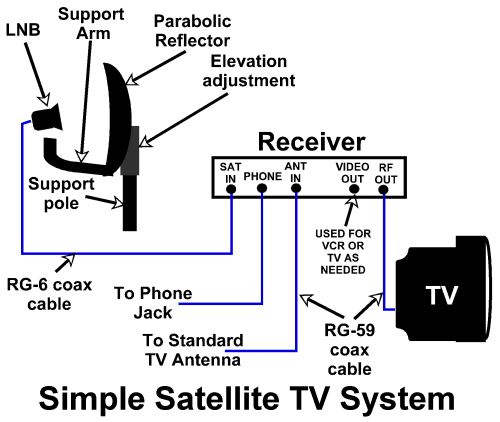
Lets take a look at that block diagram again. Be sure to follow any special instructions in your owners manual. Hook the satellite antenna to the satellite in jack on the receiver. Hook up the TV to the TV out jack on the receiver. Make sure that the TV is set to the correct channel per the instructions. You may also run a coax cable from your existing TV antenna jack to the antenna in jack on the back of the receiver. This will allow you to switch between satellite programming and your off-the-air- antenna using your satellite system's remote. The phone line may be left unhooked. Some systems will require you to have the phone line plugged in to receive certain types of programming, like Pay Per View movies. If you are in your RV, you really don't have an option unless you are hooked up to a land line...
This is a really great time to break out the manual that came with your satellite system and read about aligning the dish!
Turn on the TV and set it to the recommended channel. You should see a warning message that the satellite system is trying to find the signal. Using the remote, bring up the setup or satellite aiming screen. There should be a place here to enter your zip code into the menu and get the recommended azimuth and elevation. This is where you need to point the dish in order to find the satellite.
The Azimuth angle given is a number found on a compass. North is 0, East is 90, South is 180 and West is 270. Therefore an azimuth of 165 would be found by facing due south and turning 15 degrees toward the east. The elevation angle is how high above the horizon the satellite is. Just imagine a line straight up, that is 90, a line straight out ahead of you is 0. A line directly in between those two lines, is 45. Find the azimuth you need on a compass, face that direction and point up in the sky at the elevation angle. Keep that position in mind while pointing your dish.
The setup screen on your TV will have a meter showing signal strength. You may have to play with the dish a bit to begin to get a reading. Move the dish in small increments and wait a few seconds each time to see if you are getting a signal in the display. Once you have a signal and a lock, fine tune the dish by moving it slightly up and down and side to side until you have the strongest possible signal.
Be sure you are on the right satellite! Direct TV and Dish Network have different satellites. Both are at nearly the same degree of vertical altitude and only a few degrees separate the two horizontally. It's easy to dial in on the wrong satellite. If you have Direct TV and point your dish at the Dish Network satellite you will get a good signal but no lock and no picture. Your setup screen should warn you if you are pointing at the wrong satellite.
Once you have a good lock on the correct satellite, you should be able to see all of your subscribed channels. If this is a brand new installation, you will only be able to see the default channel on your system. For example, with Dish Network, it's channel 100. This will tell you that you are in business. You won't be able to see any other channels until you activate your new system. Follow the instructions found in your manual. Usually, you will need to call the satellite company, tell them your receiver and smart card numbers and give them a credit card number. You will also be asked to select the programming package that you wish to have. I suggest that you start out with a very basic and inexpensive package at first. Most satellite companies won't charge you anything to upgrade your programming, but do charge you to downgrade your programming to a cheaper package. Start small and work up unless you are sure of what you want. Some systems require you to carry a certain level of programming for the first year in order to get a really good price on the system hardware.
One of the most useful tools that you can own is an inline signal strength meter, commonly called a Marriage Saver. This little device connects between the satellite dish and the receiver and allows you to find the satellite without having to use the meter on your TV. This can be invaluable when you are trying to set up your dish on a tripod a long ways away from your rig.
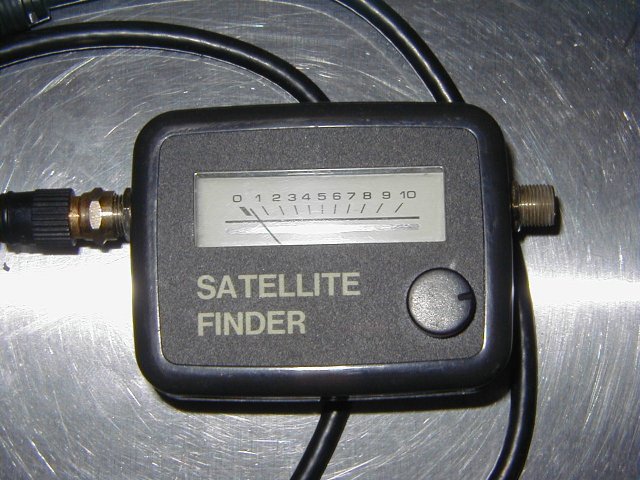
These meters also provide a tone that rises in pitch as the signal strength goes up and a lighted meter for nighttime use. With one of these meters, it's often enough to point the dish in approximately the correct direction and then slowly sweep the sky and listen for the tone to tell you when you hit the "sweet spot". These meters are much more sensitive than the one that the receiver provides on your TV and react much faster to changes in signal strength. With a little practice, you'll be able to find the satellite in seconds and fine tune it quickly. The meters are available from most RV parts sources and electronic stores that sell satellite TV. They generally cost about $40 for a simple one.
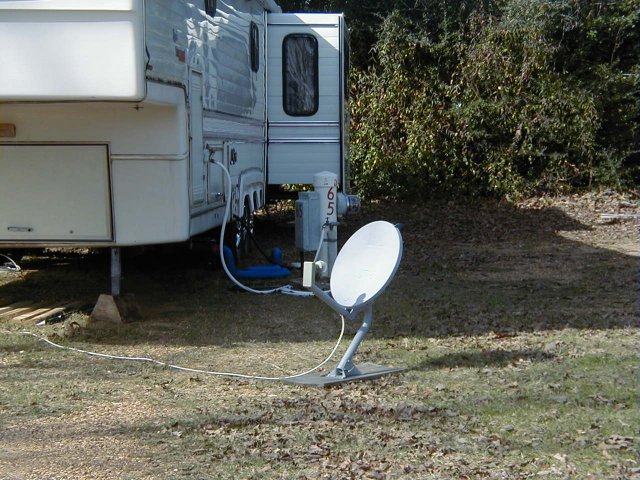
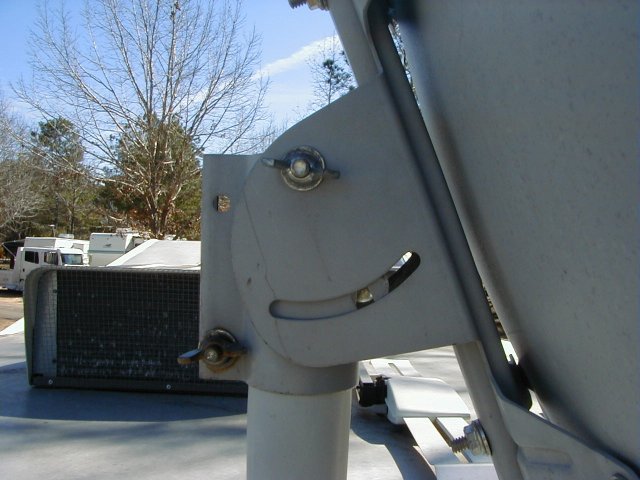
To make that little meter easier to hook up, you might consider modifying your dish to have a connector on it. This allows you to easily place the meter into the line and then remove it once the dish is set up. If you use quick disconnect push-on style adapters, it's even easier. To set up my dish, I made a short length of RG-6 cable with connectors on each end and then mounted a "barrel" connector by drilling a hole in my antenna's frame. See the pix... you get the idea.

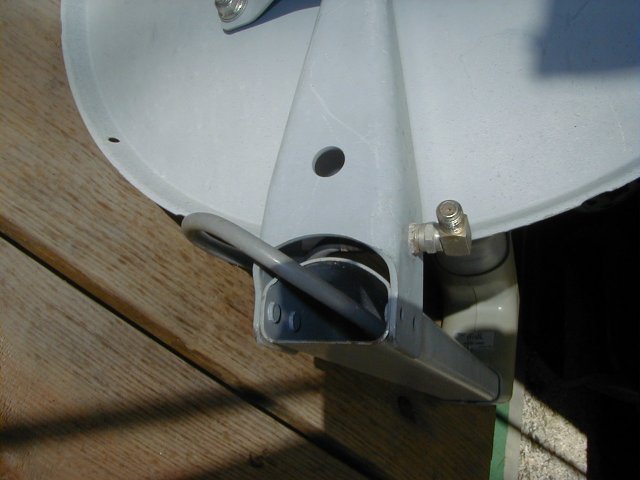
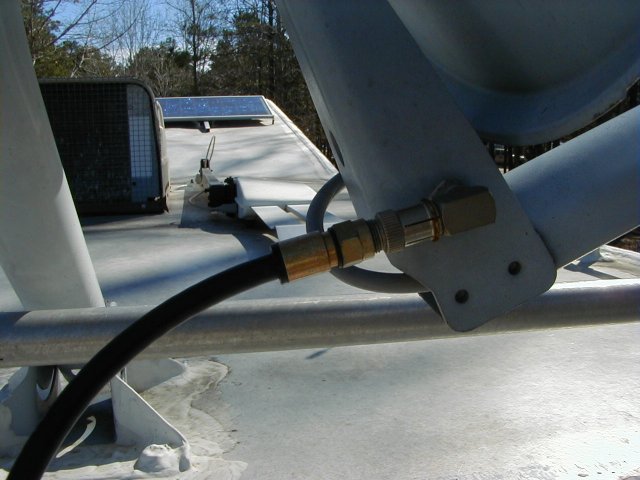
Since we're modifying the dish, lets make another change.... Replacing the existing bolts and nuts with wing nuts for all the adjustment points makes it a lot easier to quickly adjust the dish elevation and azimuth without tools!
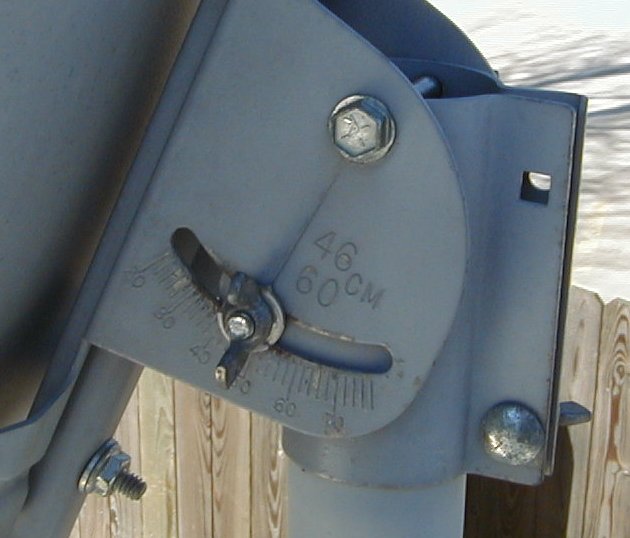
If you have the permanent type of antenna on the roof that requires manual turning and raising, there are devices that will give you a read out in degrees of the elevation of the antenna. All you have to do is elevate the antenna to the correct degrees based on zip code and then turn it till you acquire the signal. One such little gadget is the Winegard Digital Magic elevation meter. This digital elevation sensing unit gives the exact elevation of the antenna on an LCD readout inside the RV and is accurate to within one degree even when the RV is not level! The sensing unit is attached to the elevating tube, and a wall plate with LCD readout is installed inside the RV.
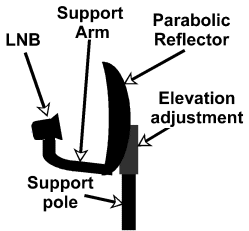
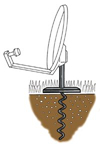
When you are attempting to set up a satellite dish in a heavily wooded area or one with lots of man made obstructions, it helps to understand how the dish really works. One common misconception is that the dish points 'directly' at the satellite. This isn't the case for most dish designs. The apparent elevation of the dish is 15 or more degrees lower than it's actual receiving window. Have I thoroughly confused you? Have a look at this diagram.... it's easier to see it than it is to explain it.....
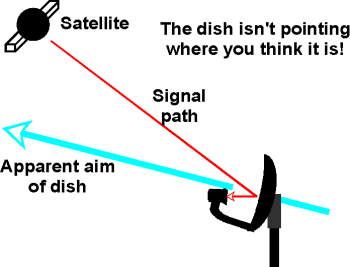
When you are trying to aim for that little gap in the trees, remembering this will probably mean the difference between success and failure!
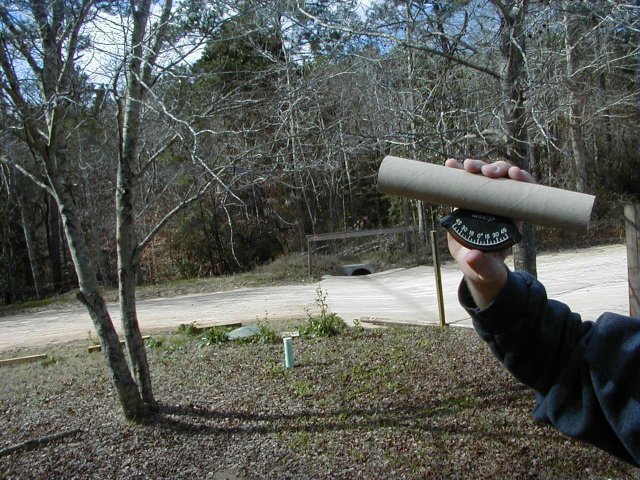
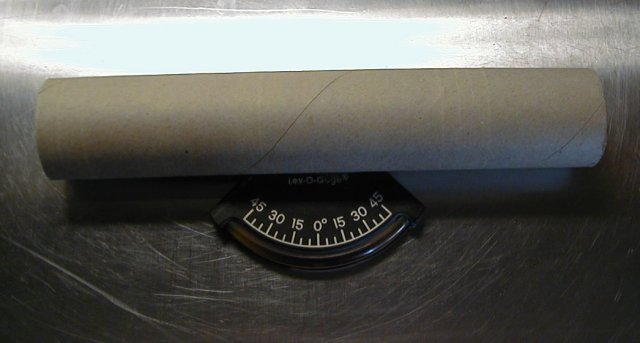
Another great little tool to help you find that hole in the trees is this easy to make elevation gauge. All you need is one of those little bubble tilt gauges that are commonly attached to the front of RVs for leveling and a piece of paper towel tube! Put them together and you've got a handy aid to determine true elevation of an object or opening in the tree canopy. To use it, simply hold (or attach permanently) the level gauge against the bottom of the tube. Angle the tube upward while watching the gauge for the desired elevation. Once there, you can look through the tube to see what might be in the path of your satellite signal. Takes a little practice, but you'll get the hang of it.

(Click for a bigger pic!)
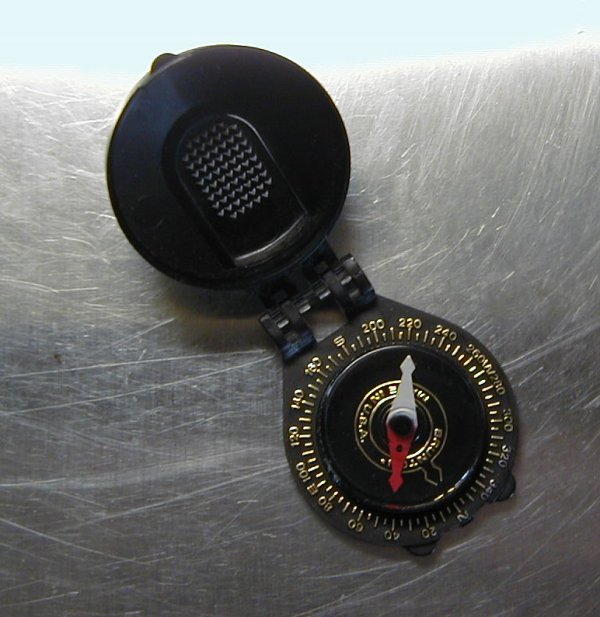
I almost forgot the most important tip of all! Take that little compass that came with your satellite system and either give it to Junior or throw it away. They are cheap pieces of junk! Do yourself a favor and drop a few bucks on a quality, liquid filled compass. It will make your life so much easier!
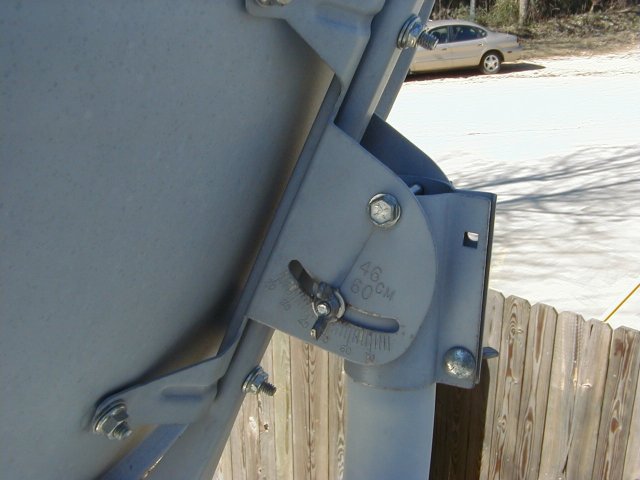
Many folks will tell you that it is absolutely necessary to have your satellite mounting post perfectly plumb and vertical. Well, I'm one of those folks who isn't interested in spending a lot of time leveling my tripod or satellite mount. I have found that with the little satellite meter and a vague idea of the proper azimuth, I have no trouble locking on to the satellite quickly, no matter how far off level my mount is. The main reason that you would want to level and plumb your mount is to allow you to use the elevation markings on your satellite antenna.
These markings can be handy for beginners and those without an inline
meter, but I have been setting my dish up several times a week for a lot
of years and I haven't looked at or used those elevation markings in ages!
As you get some practice setting your dish up in all the varied environments
that you encounter, you too will get to be an expert at it. I consider
it a challenge to get the dish going in difficult situations... sometimes
I'll spend an hour trying different locations and positions until I find
that magic spot, then go in and never turn the TV on. I guess it's just
a kind of game I play with myself: I'm not going to let those trees win!!
;-)
Most simple satellite systems can be significantly improved by adding some additional gadgets. Almost any receiver will support a VCR and a connection to your stereo system for enhanced theater-like sound. Here's how I hooked mine up:
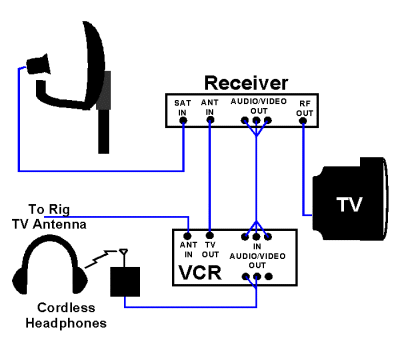
Setting things up this way allows me to watch a local off-the-air broadcast while recording a satellite channel on the VCR. I use the "line in" function of the VCR to record programming from the satellite receiver. The satellite receiver has an internal switch that allows you to change between the satellite antenna and the over-the-air antenna input. The output signal from the VCR is routed through to the TV this way. The rig antenna is connected to the VCR for viewing off-the-air programs. This will also pass cable TV signals through the system when you are plugged into park cable. Talk about multi-media! 300 channels and (of course) there'll be nothing on worth watching! ;-)
I really love my cordless headphones! They let me power up the audio track without waking up the neighbors and the wireless freedom lets me move around the rig without having to take them off. They work great for listening to music from the satellite system's large selection of commercial free audio channels. Of course, the VCR has to be powered up, since I'm using the audio jacks on it to drive the headphones, but they could just as easily be connected directly to the satellite receiver instead. If you're not interested in wireless headphones, you could easily hook up to your stereo system line in jacks and enjoy all your TV audio through the infinitely superior speakers of your stereo system.
If you and your partner can't decide on what to watch, you can add a second receiver and TV and then each of you can have the channels you love. Some systems will require you to purchase a dual LNB for the antenna to support the second receiver.
Most satellite receivers support surround sound, so adding a complete home theater is easy. Go Crazy! Replace that end table with a subwoofer and dangle satellite speakers from every cabinet.... Just be sure not to strain your pocketbook or your RV's suspension system!
AAAAGGHH!!! I can't find the !%#$*&^$# Satellite!!!
If you are unable to locate these forms using the links, simply go to the main home page for your satellite provider and use their site search to find them. Or, you can call them for more information.
Dish Network: 1-800-333 DISH (3474) www.dishnetwork.com
DirecTV: 1-800-347-3288 www.directv.com
Having been a Dish Network customer for years, I can offer some tips based on my own experiences. When I signed up back in 1997, I was up front with them, explaining my fulltime RV status. When problems arose, it sometimes took a couple of attempts to find someone who understood what I was trying to do, but I was always able to get the problem solved. Often, it was necessary to explain how to do it to the technician.... It really helps to know how their system works...
A good example is what happens when you travel from one time zone to another. When I first traveled from Out West to Back East with my new satellite system, the time shown on my program guide was off by 3 hours. Calling Dish Network, I explained that I was in an RV and had traveled to a new location and needed the time zone changed on my program listings. After talking to several people and getting several mutually exclusive wrong answers, I finally found someone in Tech Support who knew how to fix it. Seems that when you are identified as a RV customer, there is a special field on your account information called: "RV Location". Entering a zip code or city name into this field will automatically re-calculate your time zone and update your receiver through it's satellite link. Over the last few years, I have had occasion to need this changed several times and every time I call and am greeted with the answer "we can't do that", I simply explain about the "RV Location" entry on my account and they are magically now able to help me. DirecTV may not experience this problem, or they may have a different way of handling it, but the principle remains the same. Find out how they fixed your problem and remember it for the next time you need to call!
I have also discovered that it is easy to pay your TV bill by either buying your services for a full year in advance, or sign up for Credit Card Auto-pay with your debit card. No bills in your mail to get lost or delayed and no late charges on your account. The Debit card has really made my life a lot easier!
OOPS! Gotta go! 'The Simpsons' is coming on!! ;-)
 |
![]()