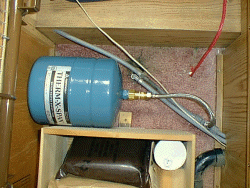
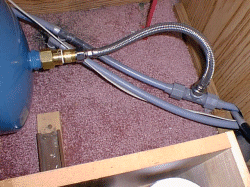
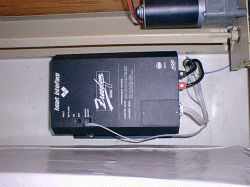
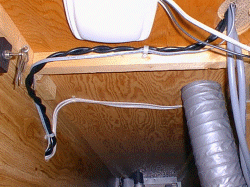
Bill writes: I added a 12 volt solenoid valve and a return line from the back (kitchen) of the 5er to the water tank. That, along with a timer and few pushbuttons (doorbell style), allows the cold water in the hot water line to recycle back to the freshwater tank. That “saves” about a pint each time the wife “needs” hot water in the kitchen. She just pushes the button, solenoid opens for 12 seconds, dumps about a quart into the fresh tank, and the water is hot at all the faucets. I added buttons at the other faucets also wired in parallel. Total cost was 25’ of tube, left over solenoid and timer, couple of fittings and some thermostat wire.
Steve writes: Our awning tried to unroll going down the highway in a heck of a storm. Anyway, the original lock sucks to begin with and mine had gotten even more into the suck end of the spectrum and allowed it to unroll a bit. No damage but when we got here, I replaced the lock with a new one from the manufacturer. Anyway, I wasn't satisfied with just that so I went one better and built my own for the other end of the awning. Check it out at
http://www.dasplace.net/UltrasportMods/UltrasportMods.html#AWNINGLOCK
Frank writes: In the section on Lighting, you mention the high current draw of incandescent lights and suggest fluorescent or halogen lights as an alternative. I ran across an article the other day that showed how to build a 12 VDC LED light. The light uses 4 white LEDs mounted in a soda bottle cap and has only 3 other components. It draws only 40ma. Here is the URL for the plans:
www.solorb.com/elect/solarcirc/4ledlit/index.html
There are also plans for a 10 Amp Solar Charge Controller located here:
www.solorb.com/elect/solarcirc/scc2/index.html
and the offer of a kit package for the charger here:
www.cirkits.com/solar/
Greg writes: I wanted to pass on a hint. Our travel trailer has four crank down scissor jacks that are a pain in the you know what! Before my last trip I went to my Fathers work shop and he helped me make a L shaped piece of iron out of 3/8 stock steel. It is about three inches long and fits into my cordless drill. Intead of all that cranking I just use the drill and zip them down in seconds. I have a serious back injury and it hurts to squat and crank these down after driving all day long. Now I just put the L shaped gadget in and zip them down!
Jim writes: Did you know that an un-subscribed cell phone can still call 911? It's true. The FCC mandates that either of the two wireless cell phone systems (wireless and non-wireless, AT&T vs Cell One, etc.) are required to handle 911 calls of the other system. If the phone isn't subscribed to either, the receiving cell system thinks the phone is subscribed to the competing system. Therefore, it allows the call. So hang on to that old cell phone or purchase one like the Track Fone at Wall Mart ($9.00 on sale) and keep it handy.
Here is another another twist for used cell phones: www.andreas.com/faq-cell911.html
Sarah writes: I noticed you mentioned the box trailer you bought to store your junk in. I don't know if you care, or if anyone ever asks you, but just in case, I had an alternate solution for this problem. Buy an old schoolbus--they can go $750 and lower for a good old one. If it sat for a while, it will need a battery and possibly new gas and spark plugs. Often with just a new battery they will start right up. You could even find a broken down one for really cheap, or for free, and tow it. You can cram a ton of stuff in them. Then you park it in "outdoor storage" (if you don't have a generous relative) at a storage place. Near me the lowest quote I got was $13 a month for a place with on-site management and barb-wire fencing. Buses are pretty easy to break into, so it's best to choose a safe location and don't keep pricey stuff in it.
David Lippincott writes: Here's a suggestion you might add to your plumbing page for installing one of the black water flush kits. These tanks are usually pretty well hidden - at least mine was. Couldn't get a drill anywhere near it. Finally went to Home Depot and bought a copper pipe reducer that had the same OD as the fitting. Heat it up with a torch and melt a hole in the tank. Worked perfectly and the inside part of the hole stayed in the fitting. Used a small nail to melt the holes for the screws. Have to toss the fitting but well worth the buck.
Will R. writes: Here is an idea you can publish on your site for an "electric toilet chemical dispenser" if you want. I took a standard windshield washer bottle I bought from PepBoys that has its own pump motor in it. I installed it in a side cabinet of my 5th wheel in an area where the sewer pipes pass through to the tank below. I drilled a hole in the 3" PVC soil line pipe below my toilet (in this cabinet) at a location higher then the windshield washer tank was mounted. I then taped and screwed a brass fitting into this hole, that has barbs for installing a hose onto. I hooked the hose from the washer tank up to this fitting after routing it from the tank pump, to a location higher then the tank (to prevent syphon), then to this fitting using hose clamps. I wired a switch in the cabinet for the washer bottle pump. I put the "potty de-stink liquid" in the washer bottle. The first time I measured how much liquid it pumps through the brass fitting. 1 oz per second on my application. Now after I dump, I just hit the button for about 4 seconds, then flush the toilet for a couple seconds to get water in it and I am done! No more spilling that stuff in the bathroom!
One of the first things that most fulltimers discover is that the refrigerator in your RV was designed for short term usage. It was never meant to run continuously like a house fridge. The biggest problem is that these units are not frost free and often have warm spots inside the refrigerator compartment. Trial and error has taught me some worthwhile tricks for dealing with these problems and I wanted to pass them on.
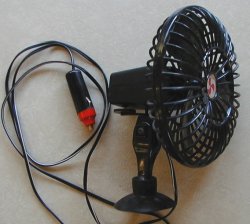
| Your best tool against frost buildup: a cheap little 12V fan. These can be found in junk stores or can be purchased new for just a few bucks. Don't bother to get a really good one... the cheapest all plastic units work just great. I got mine used for $3 at a junk store. |
 |
| To use the fan, relocate all the items on the top shelf of your fridge to lower shelves. Turn off the fridge. Place the fan where it will blow air directly on the cooling fins in the fridge compartment. Now plug it in and close the door! You may have to open the door occasionally and move the little fan to blow air on a different section of the fins, but after only an hour or so, it will melt off the accumulated frost! If you have a big buildup, after an hour or so you can reach in and slide the chunks of ice off the cooling fins easily. This really works and the best part is that the food in your fridge stays adequately cold while the fridge is off. Total time needed for a full defrost is usually only an hour or so. If you do this regularly, it keeps your fridge working at peak efficiency. Try it, you'll like it! Don't forget to turn the fridge back on when you're done! | 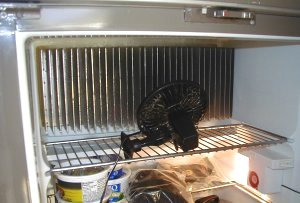 |
| To defrost the freezer, turn off the fridge and relocate all the frozen items into the refrigerator compartment. It helps to put the frozen items all together in a bag and, of course, it's a good idea to do this when your stock of frozen stuff is running low.... Now prop the freezer compartment door open and place your trusty little fan to blow air into the freezer. It's amazing how fast this works.... on a warm day, it will only take an hour or so to loosen all the accumulated frost and ice. Plus, there's no chance of damaging the freezer compartment by scraping or by using a heat source like a blow dryer. My little fan has a suction cup that works just great to stick it to the open freezer door. Keep an eye on it so that the melt water doesn't overflow and make a mess! The bag of frozen stuff will keep the food cold in the fridge and won't have time to defrost to any serious extent. After the ice is gone, dry the inside of the freezer compartment, close the door and turn the fridge back on and set it to 'Max'. Once the freezer cools back down, you can move all the frozen items back in. Remember to turn the fridge back down to the normal setting! | 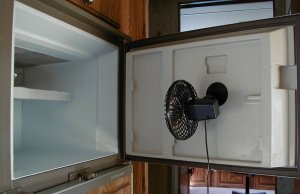 |
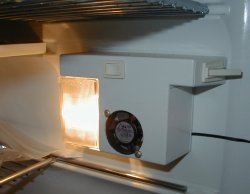
| To keep the inside of the fridge at a uniform temperature, you can buy one of those little battery powered fridge fans or try this slick little project. If your fridge has a light fixture similar to this, you can cut a small hole and install one of those tiny little fans used to cool computer processors. These fans are about 1.5 inches square and draw less than a tenth of an amp of 12V power.. There's already 12V power available right in the light fixture and it's easy to install a small switch to turn off the fan when the fridge is not in use. The fan blows air out into the fridge compartment and circulates the air nicely, keeping everything uniformly cool inside. Mine has been running nonstop for more than 3 years and continues to work great. These little fans are available from many electronic surplus stores for about $5 - $7 bucks. If you can't find one, try All Electronics Corp. They have an online catalog at www.allelectronics.com |
 |
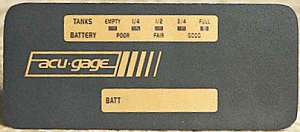
| This little item is a real winner! I was skeptical when I bought it,
but it has performed very well. It's called the Acu-Gage Tank Level Monitoring
System. The system monitors up to four nonmetallic tanks. Systems that
us in-tank probes often fail due to clogged or corroded sensors. These
sensors mount on the outside and actually read through the tank wall. Installation
is pretty easy and in most cases you can use the existing wiring from your
old tank sensors to hook this baby up. The panel requires 2 3/8"Hx 5 1/2"W
cutout. I'm very impressed with the accuracy and repeatability of the sensors.
Plus, they work perfectly all the time... no more false readings due to
sludge or yuck in the tanks. The kit includes a 1/4"W x 2 3/4" metal panel,
four tank sensors, wire nuts, connectors, foil, special adhesive, fuse
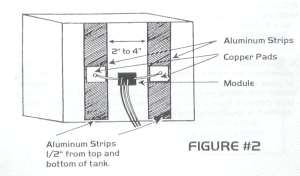
holder, and illustrated instructions. To install it, you glue a couple
of foil strips onto the outside of the plastic tank, attach the sensor
module with stickum and hook up the wires. The panel can be mounted just
about anywhere due to it's small size. A simple calibration procedure is
then used to set the unit up for your tanks. I highly recommend this unit
if you like knowing how full your holding tanks REALLY are.
Available from Camper's Choice or Camping World catalogs. |
 |
| Here's a cheap and simple solution to keeping those reference books in order. A couple of inexpensive plastic magazine files attached to the inside of a cabinet works great! I attached them with a couple of screws, but velcro or double-sided sticky tape would work too. Simple and effective... Keeps the books undamaged and right where you can reach them! | 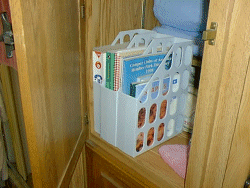 |
| After a couple years of continuous use, my greywater tank started draining real slow.... about the same time, the kitchen sink also started draining real slow. I pulled the sink trap apart and found a greasy white build-up almost blocking the pipe.... probably composed of soap scum and grease and oil. I'm really careful about putting any grease down the sink, but some is gonna go down there no matter what you do. It was easy to clean out the sink drain, but how am I gonna clean the crud out of the greywater tank? I went looking at a local RV supplier and the only thing that I could find was a bottle of stuff that was supposed to "clean tank probes". It was pretty expensive, about $15, and I wasn't sure it would do the job, so I got to talking to one of the RV service guys. He suggested a product made by Liquid Plumber that is a build-up remover. Sure enough, I found some at the local grocery and it was only a few bucks. The label said it was designed to break down greasy build-up... hey, sounds like just the thing! I started with an empty tank, poured the whole bottle down the drain and followed it with about 5 gallons of hot water. Then I hit the road and drove all day. That night when I parked, I didn't open the greywater dump valve. I just let it stay in the tank and let the tank fill up for a day or so with normal greywater. When the tank was mostly full, I dumped it and it seems to drain normally again. Yay! After the tank emptied, I closed the valve and poured some TST down the drain with a little water to lubricate the dump valve seals. Obviously, there is some risk in using a chemical in your holding tanks that wasn't specifically designed for RVs. The label on the jug said it was safe for all types of pipes and septic systems. It worked well for me but YMMV.... Use at your own risk. | 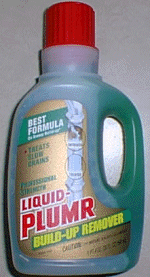 |
 |
 |
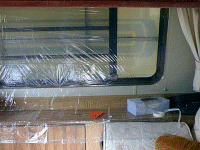 |
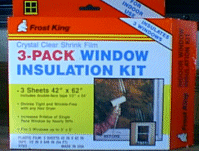
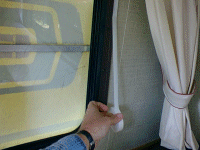
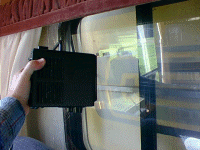
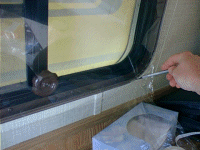
| Buy the stuff. It's available at most home supply stores and hardware stores. | Apply the sticky tape onto the metal frame around the window. | Place the clear plastic film loosely over the window and stick it to the tape. |
|---|
 |
 |
| Shrink it to remove the wrinkles, etc. They say to use a hair dryer,
but a small electric heater works fine, too.
.
|
Trim the excess film away and you're done! |
|---|
