Advanced DOSBox Tutorial
In the Basic DOSBox Tutorial you learned how to use DOSBox, and how to customize it to play games that don't run, or run incorrectly, with the default settings. This involved increasing or decreasing the emulation speed, changing the graphics mode or the type of PC being emulated, changing the SoundBlaster settings, and mounting a drive as a CD-ROM or floppy drive. These are all relatively simple to do, and allow the vast majority of DOS and Win16 games to be played.
Some games, however, require proprietary Super VGA graphics chipsets that may not be supported by DOSBox's default settings. Switching graphics modes, getting Windows 3.1 to use DOSBox's SoundBlaster emulation, and installing drivers to allow 256 or more colors are too advanced for a tutorial for beginners. You must be familiar with the Basic tutorial in order to follow these instructions. It's time to learn how to use DOSBox to play games with advanced graphics, and how to configure Windows 3.1 to play any game. We'll start by changing graphics modes, but first, a brief explanation of why we need to.
Originally, all PC graphics modes were standardized, usually by IBM. Any game or operating system can support EGA or VGA graphics cards by writing support for a single standard, and any graphics card that supports that graphics mode will be supported. After VGA, IBM tried to make 8514/a the new graphics standard. It supported a 1024x768 resolution with 256 at 43.5 Hz interlaced (meaning that odd and even lines were drawn on alternate frames), and 640x480 with 256 colors at 60 Hz non-interlaced (or progressive, meaning that the entire screen is drawn every frame). For one reason or another, the standard didn't catch on, and soon there were dozens of incompatible graphics chipsets that claimed "Super VGA graphics". Common resolutions were 600x480, 800x600, and 1024x768, and common color depths were 16, 256, 32K, 64K, and 16M colors. How many of these modes were available largely depended on how much video RAM a graphics card had.
DOSBox supports Super VGA graphics, and will run the standard "Super VGA (800x600, 16 colors)" mode in Windows 3.1 with the default settings. DOSBox supports some of the most popular SVGA chipsets of this era. At present, it supports early graphics cards from S3 Graphics, the Tseng Labs ET3000 and ET4000, and the Paradise PVGA1A. An emulator exists that allows ET4000 graphics cards to run 8514/a software, which is great because DOSBox doesn't emulate the 8514 graphics mode yet. We'll go through using each of these modes in DOS and Windows.
DOSBox has a plain text configuration file called dosbox.conf. You can open it in your default text editor by finding DOSBox in your Start Menu, going into the Configuration menu and clicking on "Edit Configuration".
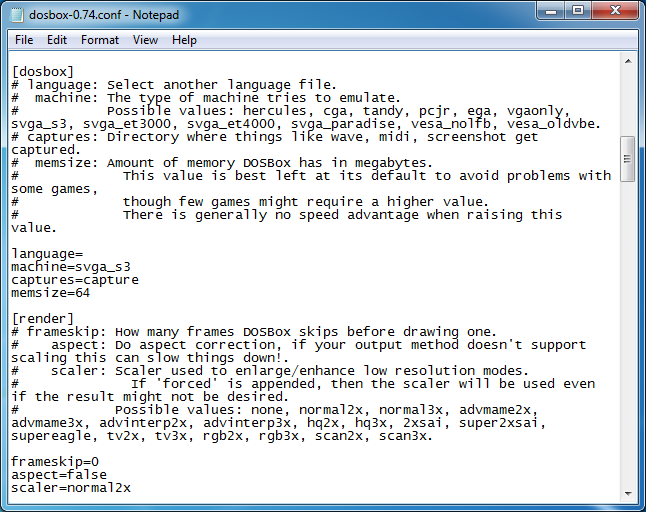
Configuration options are arranged into groups. The [dosbox] group has a setting called "machine", which allows you to choose what graphics standard you want to emulate. S3 emulation is selected by default. Since SVGA graphics cards are backwards compatible with earlier standards, it's safe to leave this on even if you're playing non-SVGA games.
MoraffWare was one of the first companies to add Super VGA graphics modes to their games. Let's take the example of Moraff's Escapade. Many MoraffWare games start with a setup screen that asks you to select a graphics mode. Escapade just includes five executable files, named ESCMONO, ESCMCGA, ESCAHEAD, ESCTRID, and ESCTSENG. The readme file explains that these are for monochrome VGA, MCGA, Ahead Systems 1 MB, Trident 1 MB, and Tseng Labs 1 MB cards. The monochrome VGA and MCGA versions both use Mode 13h, which is 320x200 with 256 simultaneous colors from a palette of 262,144 colors. The Ahead B (Mode 63h), Trident TVGA 8900 (Mode 62h), and Tseng Labs ET4000 (Mode 38h) versions are all 1024x768 in 256 colors, which means that they have roughly four times the vertical and horizontal resolution of MCGA/VGA (16 times as many pixels!), and still with 256 colors! DOSBox's default settings limit your options to the monochrome VGA and MCGA versions.
The only chipset that DOSBox currently supports from that list is the Tseng Labs card, so set machine to "svga_et4000". Here's a side-by-side comparison of the two video modes. You'll have to click on the Tseng Labs version to see the whole screenshot because it's so huge!
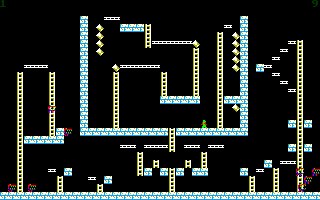 320x200 MCGA graphics in DOSBox |
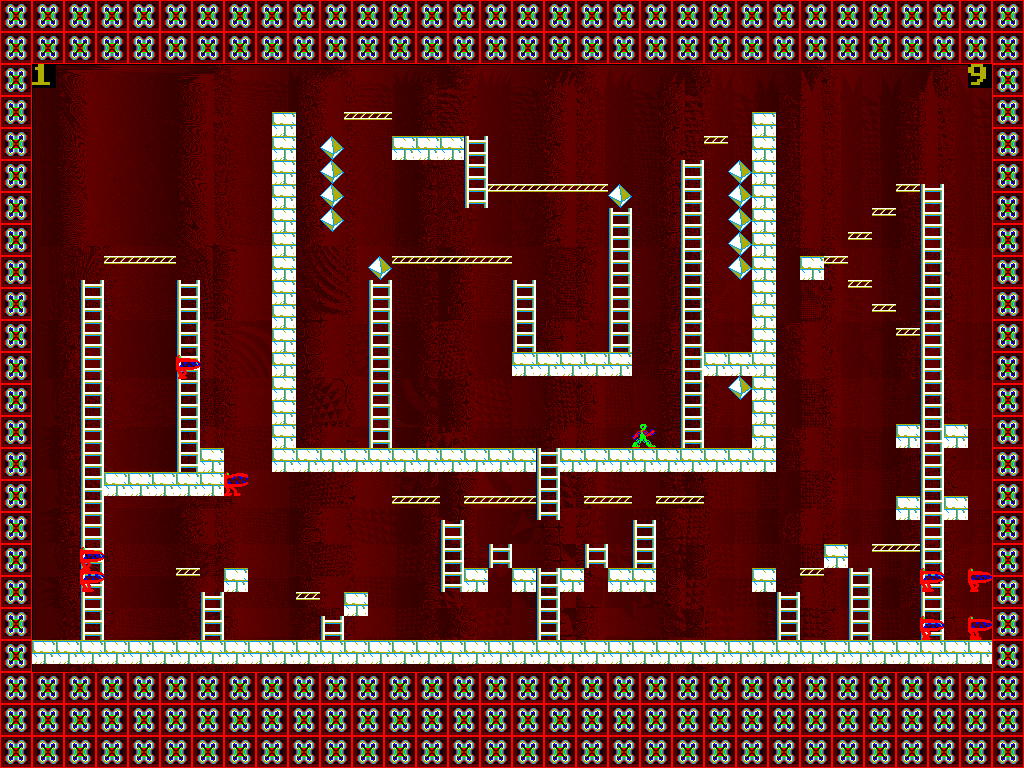 1024x768 ET4000 graphics in DOSBox |
Okay, so maybe Moraff's Escapade still looks pretty lousy at Super VGA resolutions, but it looks better than the VGA mode. Escapade happens to support both VGA and SVGA resolutions, and now you can see what you've been missing if you've just been using the default settings in DOSBox!
Nerd FYI: An emulator called PCem can emulate the Trident TVGA 8900D, if you want to see what ESCTRID looks like. After several minutes of displaying a shaded line that was a single pixel high, it looks like it gave up on drawing the background and rendered an image that was otherwise identical to the ET4000 version.
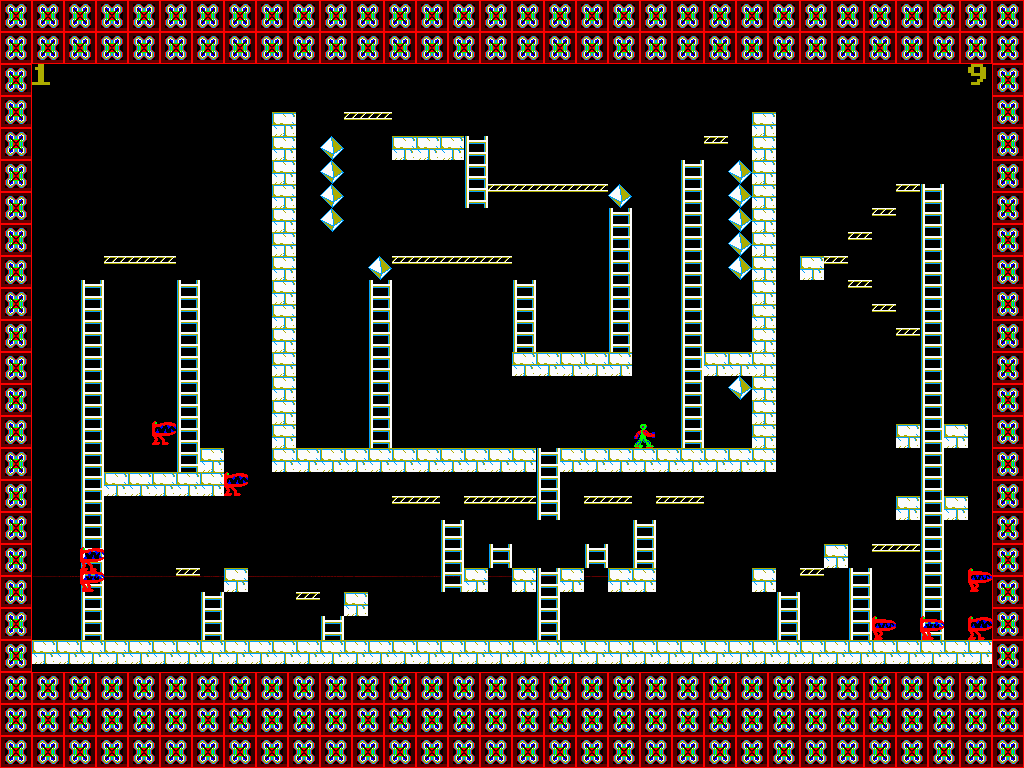
1024x768 TVGA8900 graphics in PCem
For playing DOS games, it's just this easy. Playing games in Windows 3.1 is a bit more complicated.
First of all, let's be clear on this point: DOSBox is a DOS emulator. It doesn't emulate Windows 3.1, so you'll need a copy of Windows if you want to run Win16 games in DOSBox. The steps below detail the fastest and easiest way to run Windows 3.1 in DOSBox.
Take your Windows installation disks and copy all of the data into a folder on your hard drive. For the purposes of this tutorial, let's call this folder INSTALL. Installation within DOSBox will be much faster this way, and you'll be able to make changes to your Windows setup without having to get your floppy disks when Windows asks for them.
Windows expects to be run from a folder, named WINDOWS by default. It will not run properly if you mount the Windows folder in DOSBox. Instead, create a folder for all of your Windows games — let's call it WINGAMES. Put the folder with the files from your Windows installation disks in WINGAMES, and mount C:\WINGAMES as the C: drive. Navigate to your installation directory by typing:
cd install
setup
Installation occurs in just a few seconds, since it's installing from the hard drive instead of floppy disks. Of course, you had to copy all of the data off of the floppy disks before, but you'll save a lot of time whenever you reinstall Windows in the future, or when Windows prompts you for one of the installation disks.
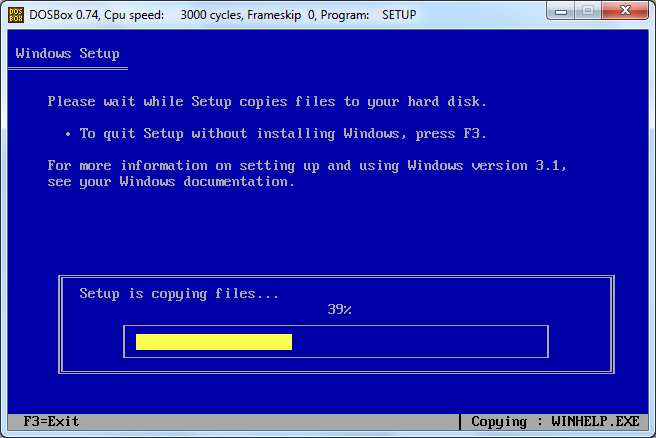
Once installation is complete, everything should look like this.

Your mouse probably won't work when installation is complete. Don't worry about that. You can exit Windows by pressing Alt+F to access the File menu, and press X or navigate to Exit Windows with the arrow keys. Always shutdown Windows properly to be sure that your changes are saved.
Close DOSBox and start it up again. When you told Windows to install to C:\WINDOWS, it was installed to C:\WINGAMES\WINDOWS (this happens automatically if you choose Express Install). Since WINGAMES will always be mounted as C:\, you'll run windows by changing directory to the WINDOWS folder and typing "WIN".

Now everything you need, from Windows itself to the installation disks to your library of games, are all in a neat little package in your WINGAMES folder. Whenever Windows asks you to insert one of your installations disks, direct it to look for the files at C:\INSTALL. All of your games should be in folders within WINGAMES, so you can add programs by directing Windows to look for them in folders within the root directory (C:\).
Remember, you must mount WINGAMES as the C: drive, not WINGAMES\WINDOWS, otherwise Windows will not be able to find any of the program groups.
Okay, so you logged back into Windows. Did Windows greet you with a musical welcome? No? That's because it doesn't know that you have a sound card! You can add a Sound Blaster 1.5 by going into the Control Panel and selecting Drivers, but you probably won't have MIDI support if you do. To get complete audio support in Windows, including MIDI, you should install the Sound Blaster installer from the Drivers section.
Unzip the Sound Blaster drivers into a folder like WINGAMES\SB and navigate to the folder in DOSBox. Run INSTALL.EXE.
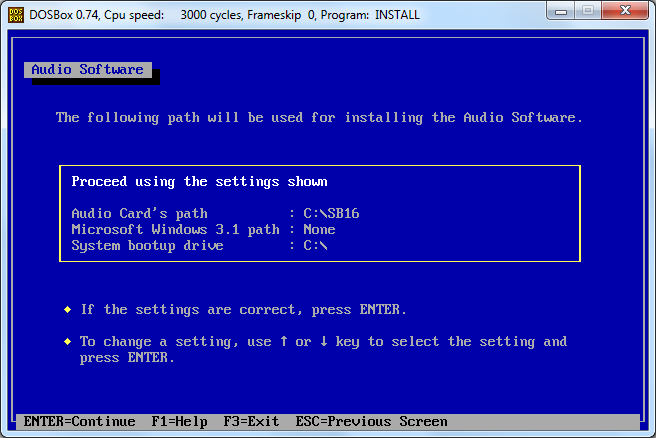
By default, there is no path to Windows, so use the arrow keys to select "Microsoft Windows 3.1 path" and type in "C:\WINDOWS".
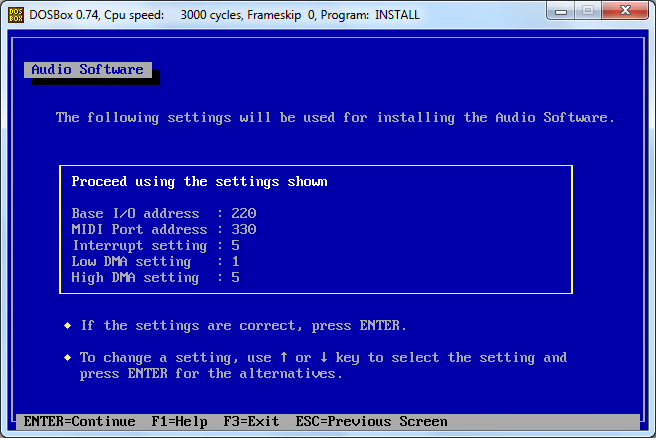
When you get to the screen that lets you select the sound settings, the IRQ will be set to 5 by default. The DOSBox default is 7, so use the arrow keys to highlight "Interrupt Setting" and change it to 7.
Other than those two changes, you can press Enter on every screen and the installer will set everything up for you. The next time you run Windows, you'll have full Sound Blaster sound!
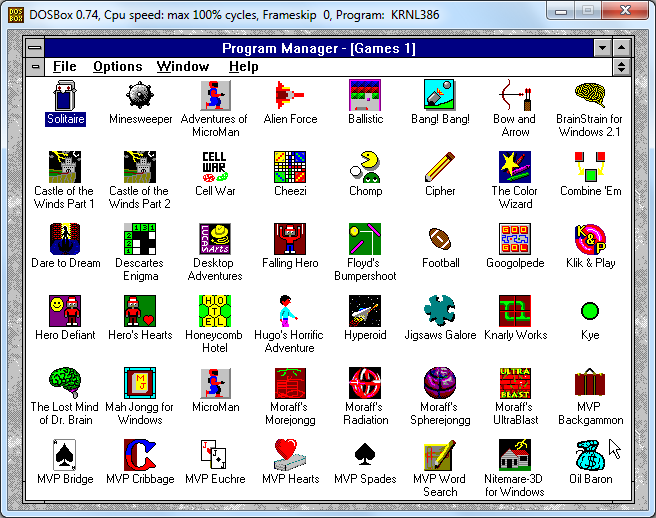
You can configure Windows any way you want, from the wallpaper to the screensaver, and start adding games to your Games group. Windows looks and sounds exactly the way you remember it, and you can use all of your favorite features, from Minsesweeper to the old Windows Calendar program. The Windows calculator still has that bug that Microsoft was too embarrassed to reveal (try subtracting 3.1 from 3.11). Put DOSBox into full screen mode and it's just like running Windows on an old PC!
Most early Windows games only expected you to have VGA graphics, so this might be as much as you need to know. Later on, games and multimedia applications started to require higher resolutions and color depth. QuickTime came along and allowed full motion video clips to be added to games and encyclopedias on CD-ROM (remember how to mount a CD-ROM from the Basic Tutorial?). You're in high resolution VGA mode right now, which is 640x480 with 16 colors. Games are going to start demanding 256 or even 65 536 colors, which is where things start to get really advanced. Regular DOSBox will let you select Super VGA (800x600 with 16 colors), but we're going to need Daum Cafe's DOSBox to use the Multiple SVGA chipset patch, and then (unlike DOS games) we're going to have to install Windows drivers.
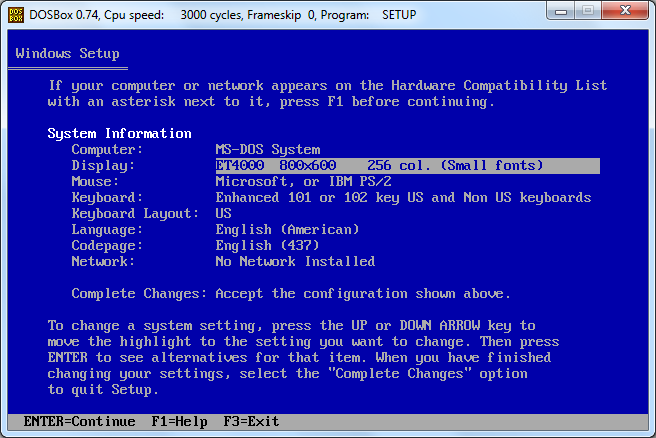
To change the display settings, go to the Main program group and select Windows Setup. Hit Options, then Change System Settings. When you activate the dropdown menu for Display you'll notice that, with the exception of Video 7, none of the options allows high resolutions or color depths. At the bottom of the list is an option to add a new display mode, which requires drivers from the graphics card's manufacturer. This is why people hated Windows. Absolutely everything needs a driver!

Okay, so which graphics cards can we emulate again? DOSBox can emulate an S3, Tseng Labs ET3000 or ET4000, or a Paradise PVGA1A. It doesn't really matter which one you choose, as long as you have Windows drivers for one of them. If you ever owned a card with one of these chipsets, you can use your old installation disk. If not, I've located drivers for all four chipsets for you! You can download them in the Drivers section. I recommend the S3 drivers since that's the DOSBox default.
Since you may want to try emulating more than one chipset, and since you may have to reinstall Windows someday, it's a good idea to create a DRIVERS folder in your WINGAMES folder. It's also a good idea to keep each set of drivers in a different sub-folder since some of your files will have the same name.
Once you've placed all of the drivers you want in the DRIVERS folder, go into the configuration file for Daum Cafe's DOSBox and select the svgachipset that you have Windows drivers for. Run DOSBox and go back into Windows 3.1 and select "Other display" from the list of display modes. Tell it to look for the drivers in C:\DRIVERS\(whatever). Windows will give you a list of available display modes, and you can pick whatever you want. Windows will restart, and now you can display 256 or more colors!
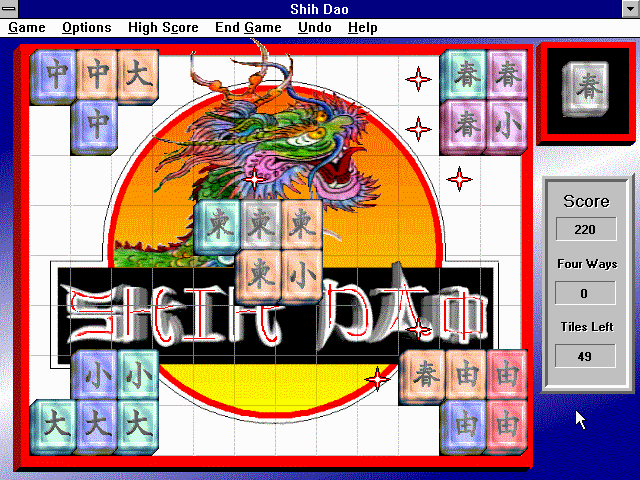
Shih Dao in 256 color mode with ET4000 drivers
WARNING! There is a good chance that any display mode that you choose won't work. Your display could become completely unreadable, making it impossible to get to Windows Setup to change it back! If you start Windows and the display is unreadable, don't panic! Shut down DOSBox and start it again. You can change your display settings from the DOS prompt. Type:
cd
windows
setup
Now you can select something safe for your display mode, like VGA.
And that's about it. You're now an advanced DOSBox user, and you can play both DOS and Windows games in DOSBox!